
.svg)


How to Create a Team on Lucidya
Learn how to create and configure a team in Lucidya, including setting working hours, enabling auto-reply, and adding team members.
Teams allow you to organize your agents, define working hours, and manage availability. This article walks you through creating a new team from start to finish.
Before You Start
You need Manager permission for the General Settings module to create or edit teams.
Step 1. Access the Teams Page
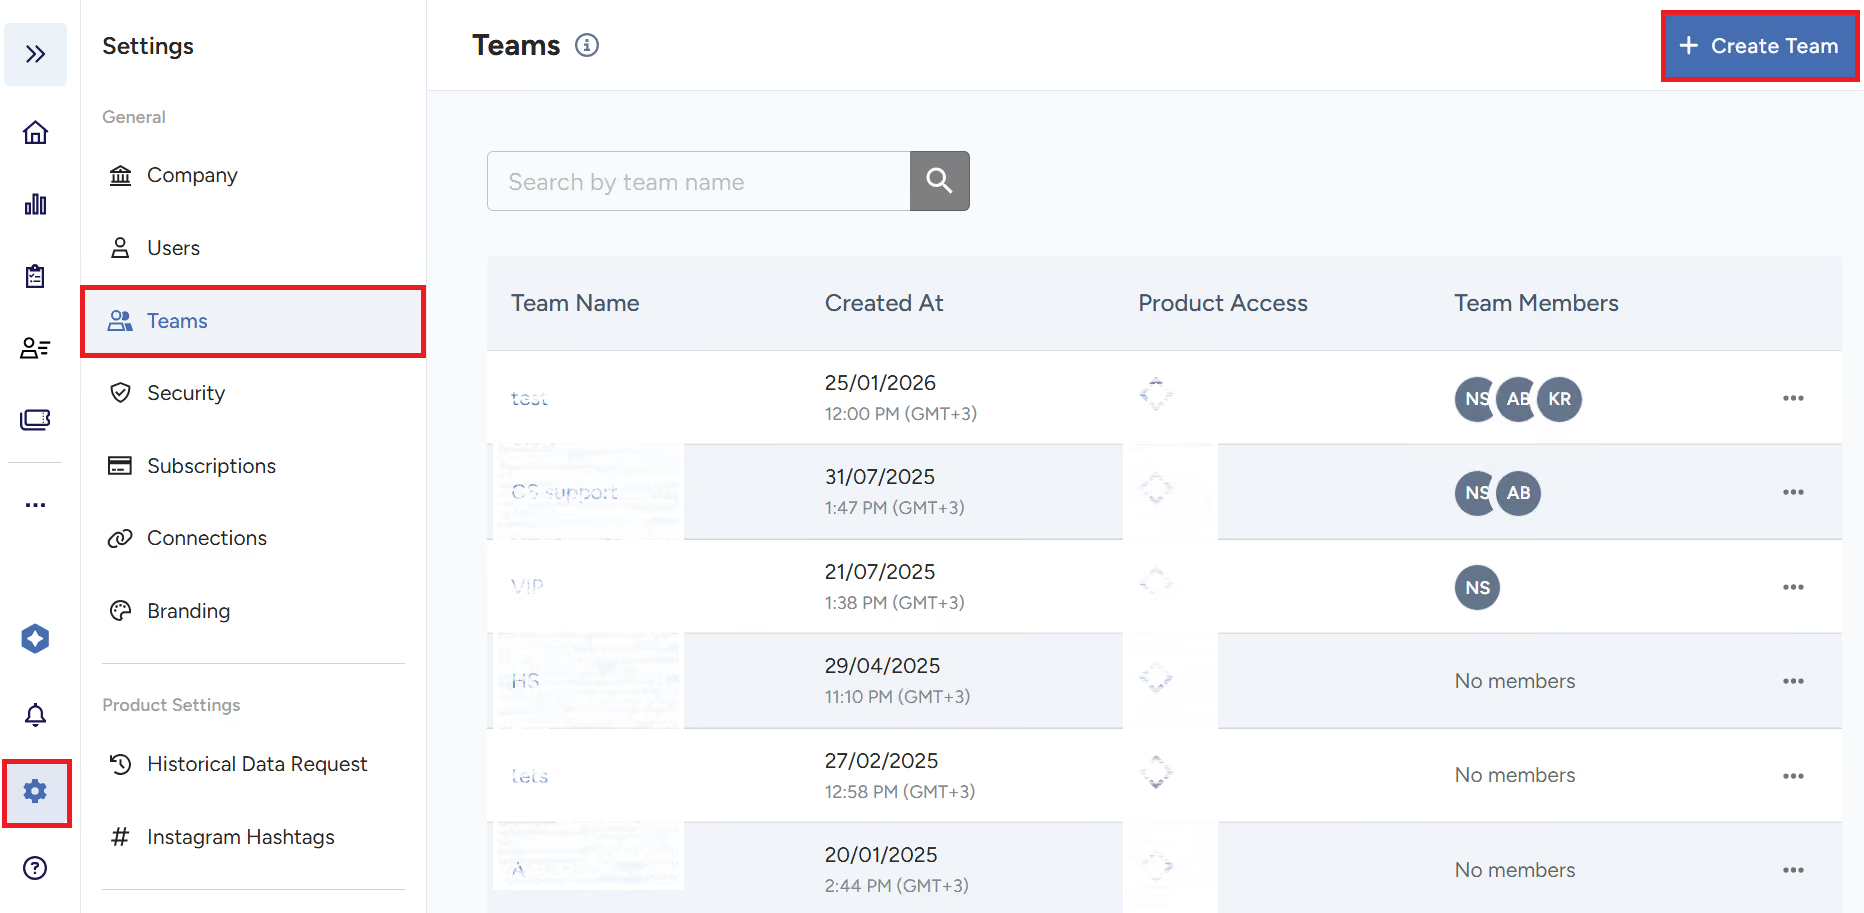
- Navigate to Settings from the main menu.
- Click Teams.
- In the top-right corner, click + Create Team.
Step 2. Enter Team Information
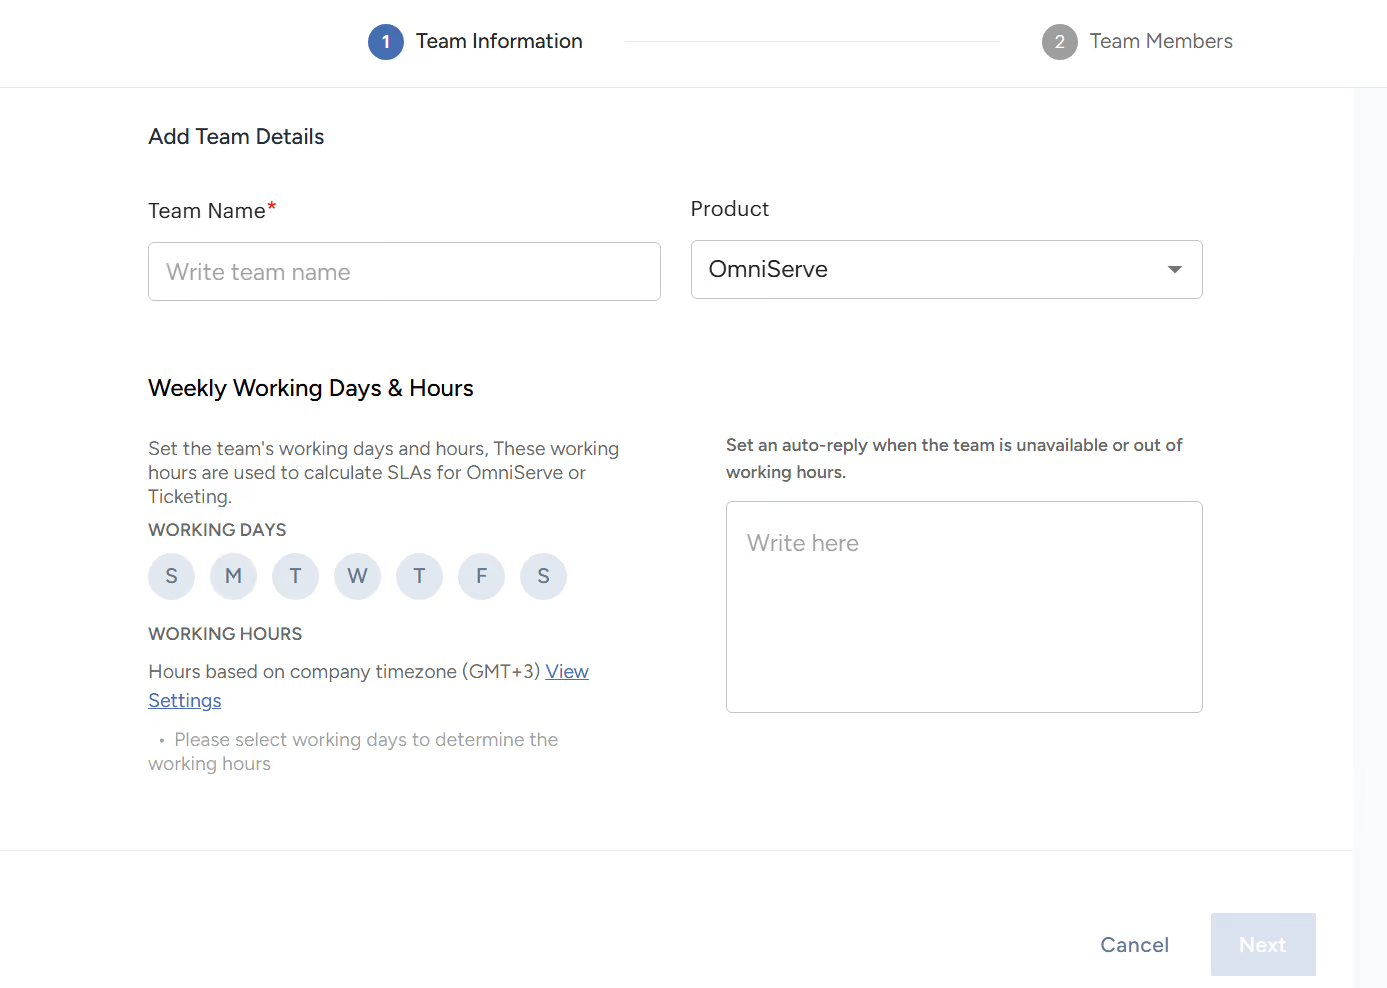
Fill in the following details:
- Team Name: enter a name for your team.
- Product: select the product this team will be associated with.
- Weekly Working Days and Hours: define the days and hours your team is available each week.
- Auto-Reply (optional): set up an automated message that's sent when the team is unavailable or outside of working hours, so no conversation goes unanswered.
Step 3. Add Team Members
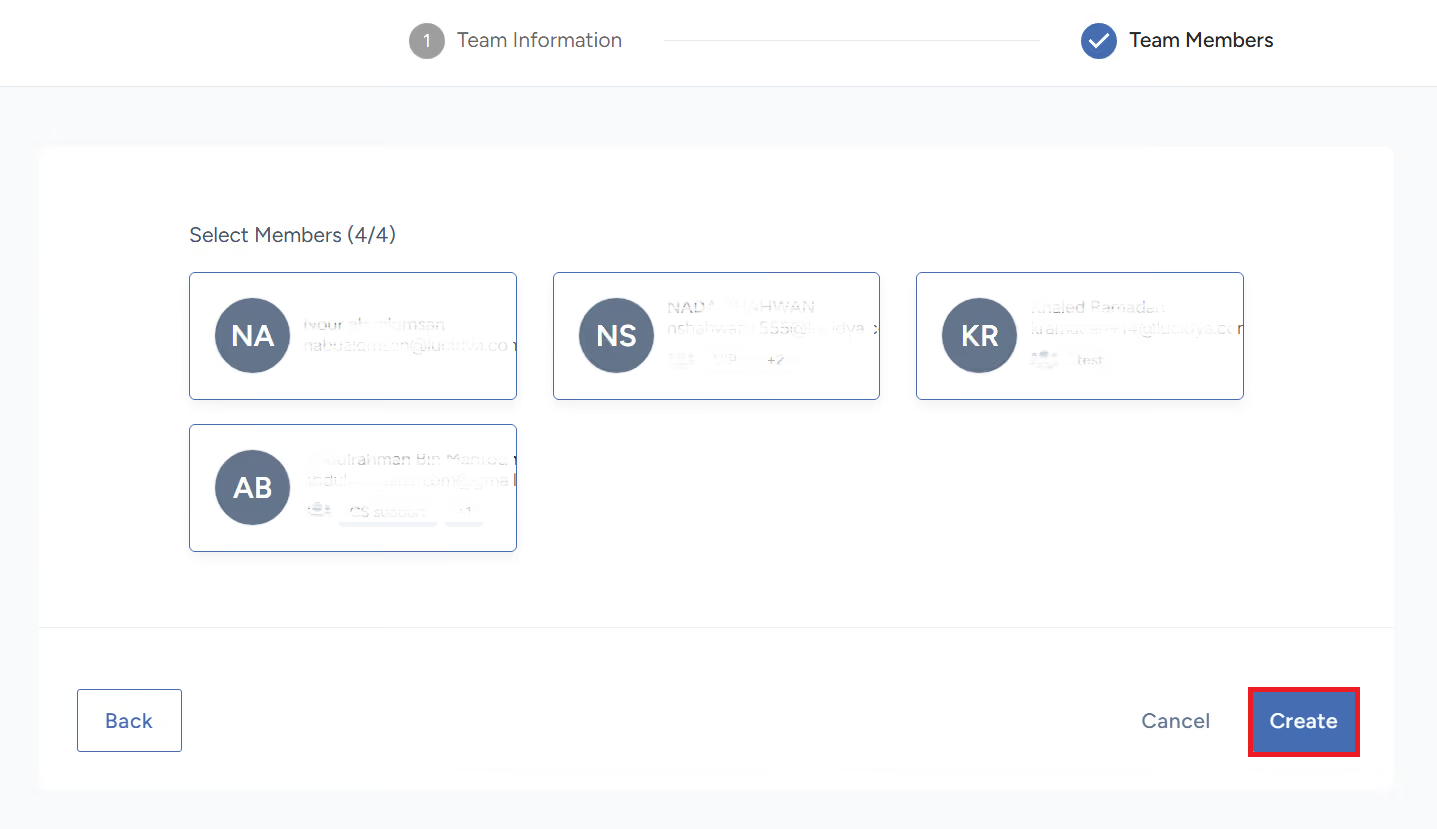
Add the members you want to include in this team, then click Create.
For further assistance, contact Lucidya Support.
Frequently asked questions
Navigate to Settings, click Teams, then click + Create Team in the top-right corner. You'll be guided through two steps: entering your team information and adding team members.
You'll need to provide a team name, select the product the team is associated with, and define the team's weekly working days and hours.
Yes. When setting up your team, you can define specific working days and hours. Outside of these hours, the team is marked as unavailable.
Auto-Reply is an optional feature that sends an automated message to users when the team is unavailable or outside of working hours, ensuring no conversation goes unanswered.
Yes. You can add as many members as needed from your existing user list.
Yes. Return to the Teams section under Settings at any time to update your team's details, working hours, or member list.