
.svg)


How to Create a Quick Search
Learn how to set up and run a Quick Search query across X and News & Blogs data sources.
Quick Search lets you run a single query across multiple data sources at once, without waiting for full data collection. Spot trends, analyze sentiment, and validate keywords instantly with preliminary results that may differ from your monitor data.
What You Can Do
- Choose data sources to search across
- Set search date ranges
- Write and save search queries
- View search results with analytics
- Manage and reuse saved searches
Before You Start
Quick Search is available in the Social Listening module. You need access to Social Listening to use this feature.
Step by Step
Step 1 - Navigate to Quick Search
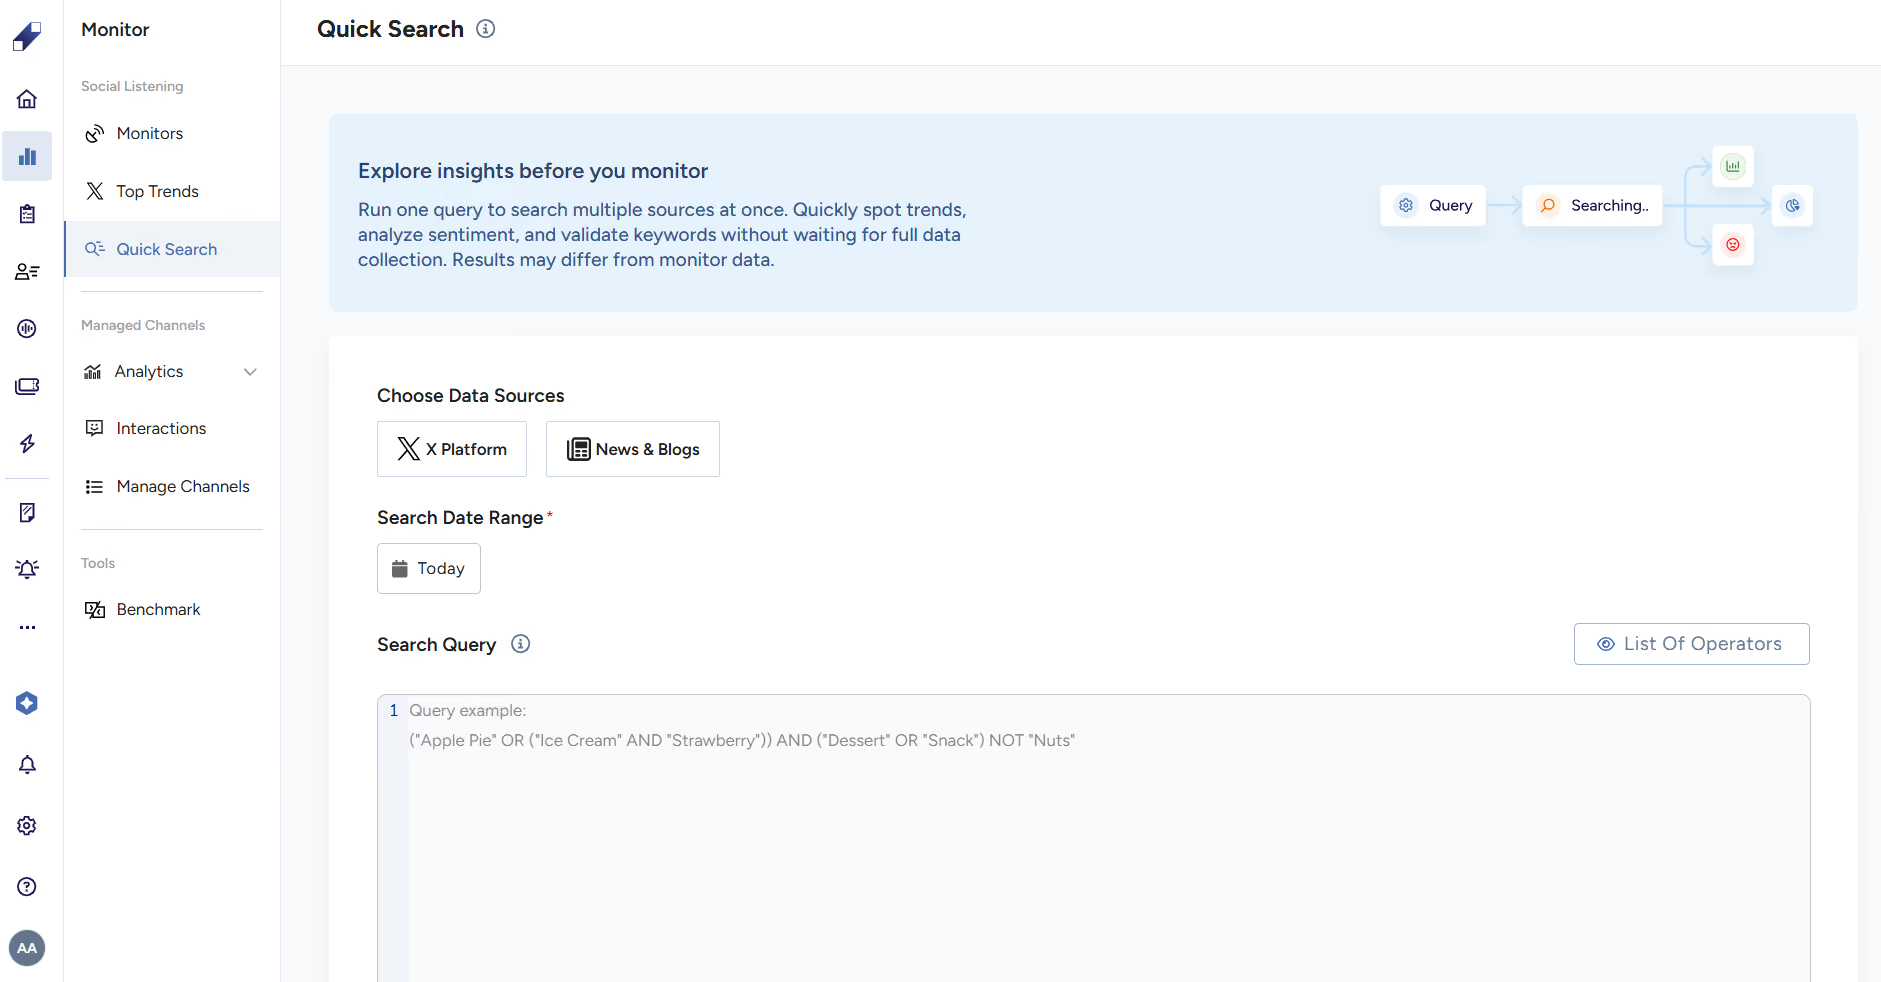
Go to Social Listening → Quick Search.
Step 2 - Choose Data Sources
Select which sources to search:
- Platform (X)
- News & Blogs
You can select one source or both. Selected sources appear as active buttons.
Step 3 - Set Search Date Range
Select your date range using one of these options:
- Today
- Last 7 Days
- Last 30 Days
- Custom Dates
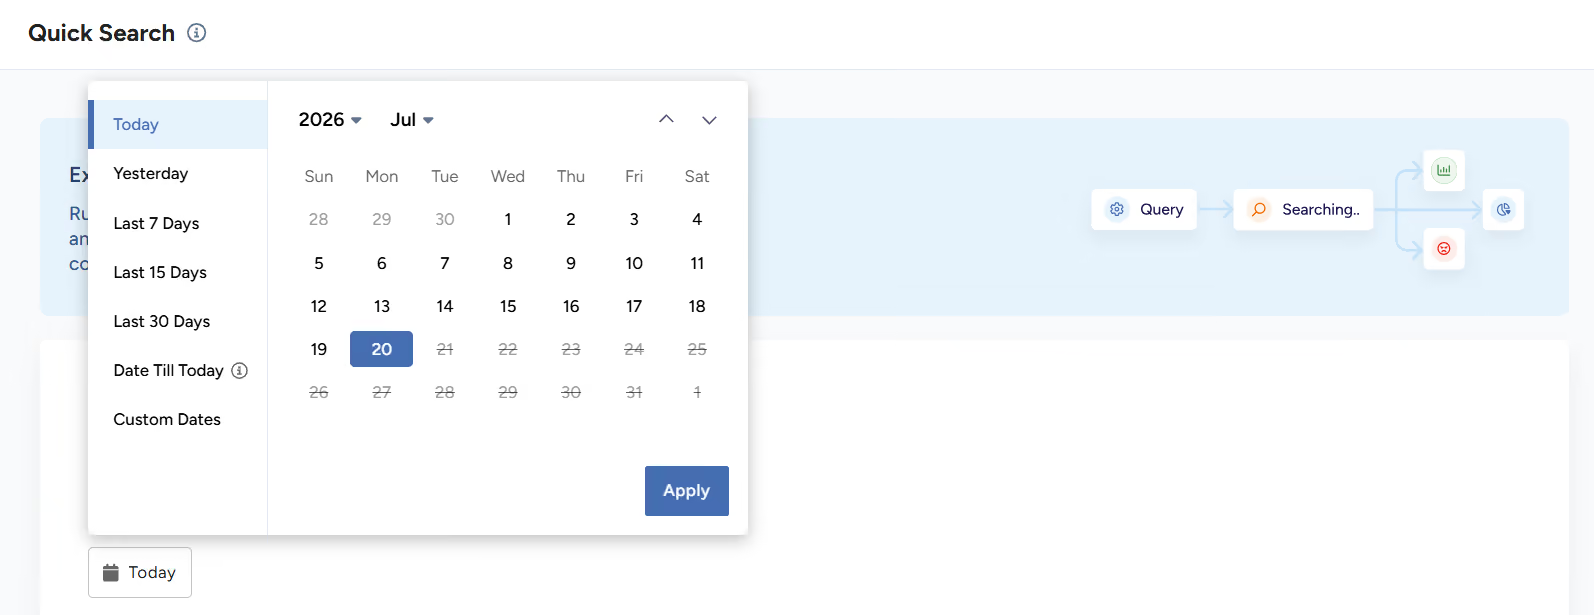
For custom dates, click the Custom Dates button to open a calendar picker, then select your start and end dates. Click Apply to confirm.
Note: Search date range is up to 30 days of Historical Data.
Step 4 - Write Your Search Query
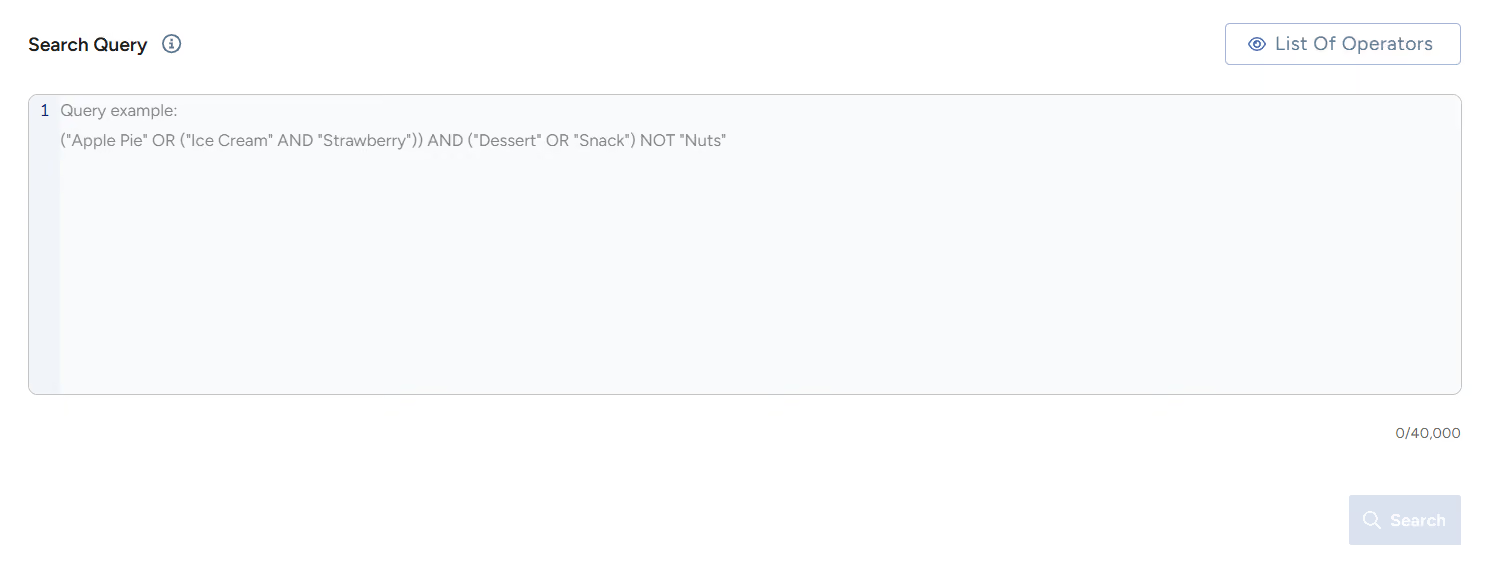
Enter your search query in the Search Query field. Use these operators to refine your search:
- AND: Includes results containing both keywords (example: apple AND juice)
- OR: Includes results containing either keyword (example: apple OR juice)
- NOT: Excludes results containing the specified keyword (example: apple NOT juice)
- NEAR: Finds keywords within N words of each other (example: where NEAR/4 orange)
You can also use wildcards to match variations:
- *: Matches any number of characters at the beginning or end of a word
- ?: Matches any single character within a word
More variations are available to be used.
Step 5 - Run the Search
Click the Search button to run your query. Lucidya will search the selected sources and display results.
Managing Saved Searches
After running a search, you can save it for future use.
Save a New Search
Click Save as New and enter a name for your search. Lucidya will store it in Your Saved Searches.
View Saved Search Results
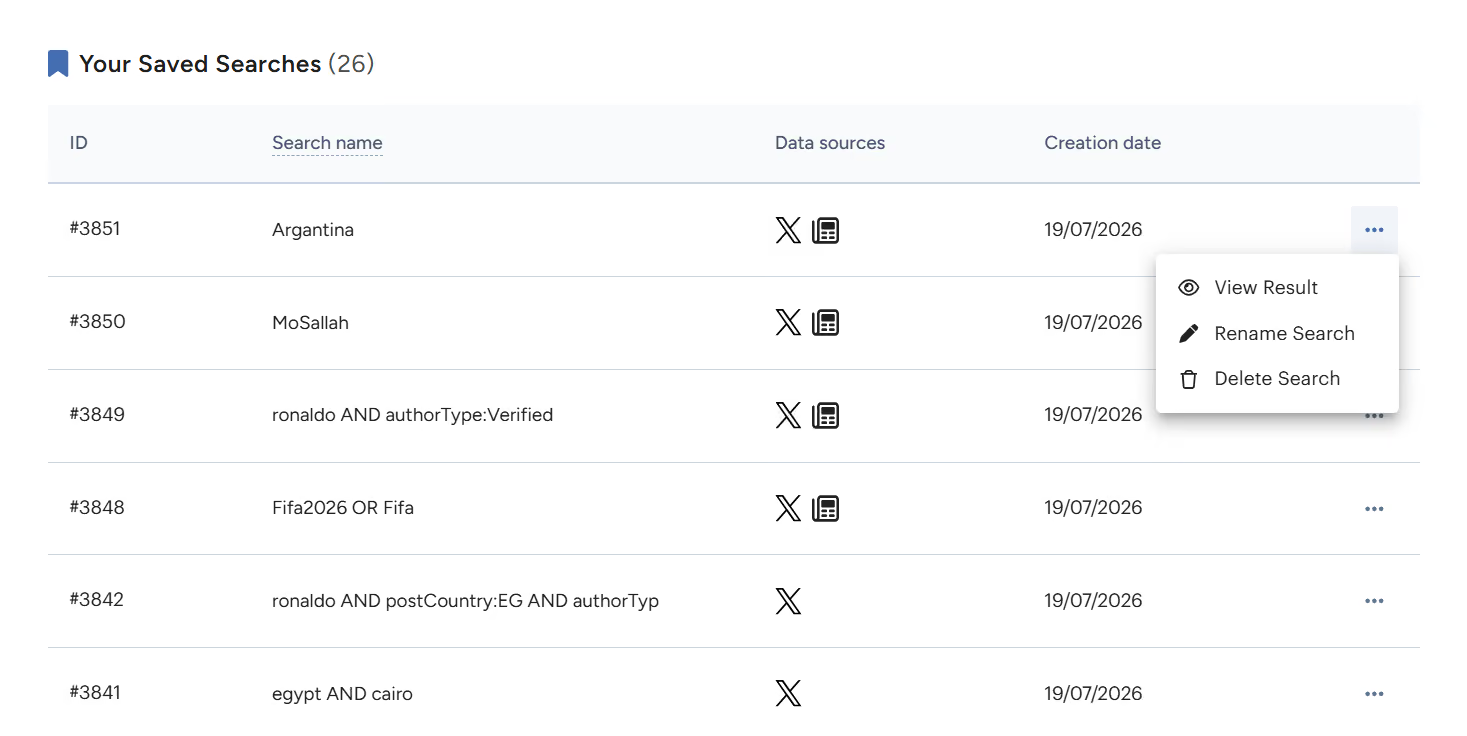
In Your Saved Searches section, click the three-dot menu next to a search and select View Result to open that search's results page.
Rename a Saved Search
Click the three-dot menu next to a saved search and select Rename Search. Enter the new name and click Save.
Delete a Saved Search
Click the three-dot menu next to a saved search and select Delete Search. Confirm the deletion. This action cannot be reversed.
For further assistance contact Lucidya Support.
Frequently asked questions
Quick Search shows results based on available historical data at the time of the query. Monitor data is more comprehensive because it continues collecting data over time.
Yes. Click the three-dot menu next to a saved search and select View Result. On the results page, click Edit to modify your query, date range, or data sources. Click Save and Apply to update the current search or save as a new search.
Up to 30 days of historical data per search.
X (Twitter) and News & Blogs. You can select one or both in the same query.
Yes, up to 40,000 characters, and at least one keyword is required to run a search.